Integration with the Paperless digital document signature service
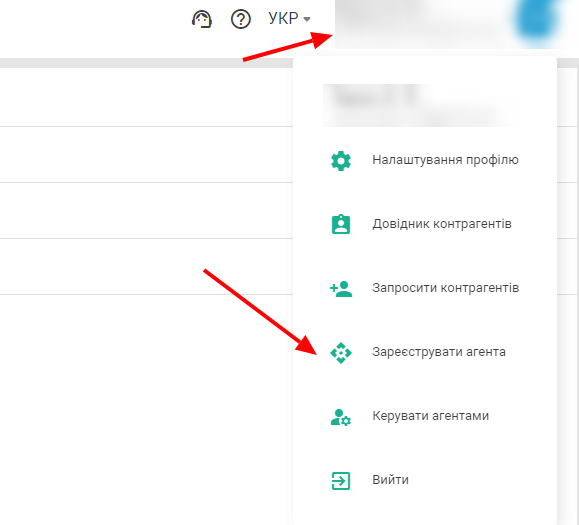
To set up the integration of digital signature of documents through the Paperless service, you need to register in the service at the link https://paperless.com.ua. After that, you need to register an agent, as shown in the photo below:
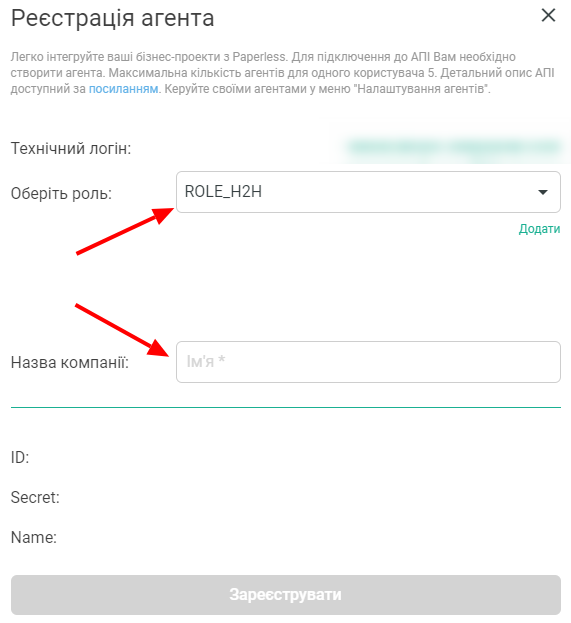
After registering an agent, you receive an ID and Secret (Agent Management section), which you need to insert into the office settings in CRM:

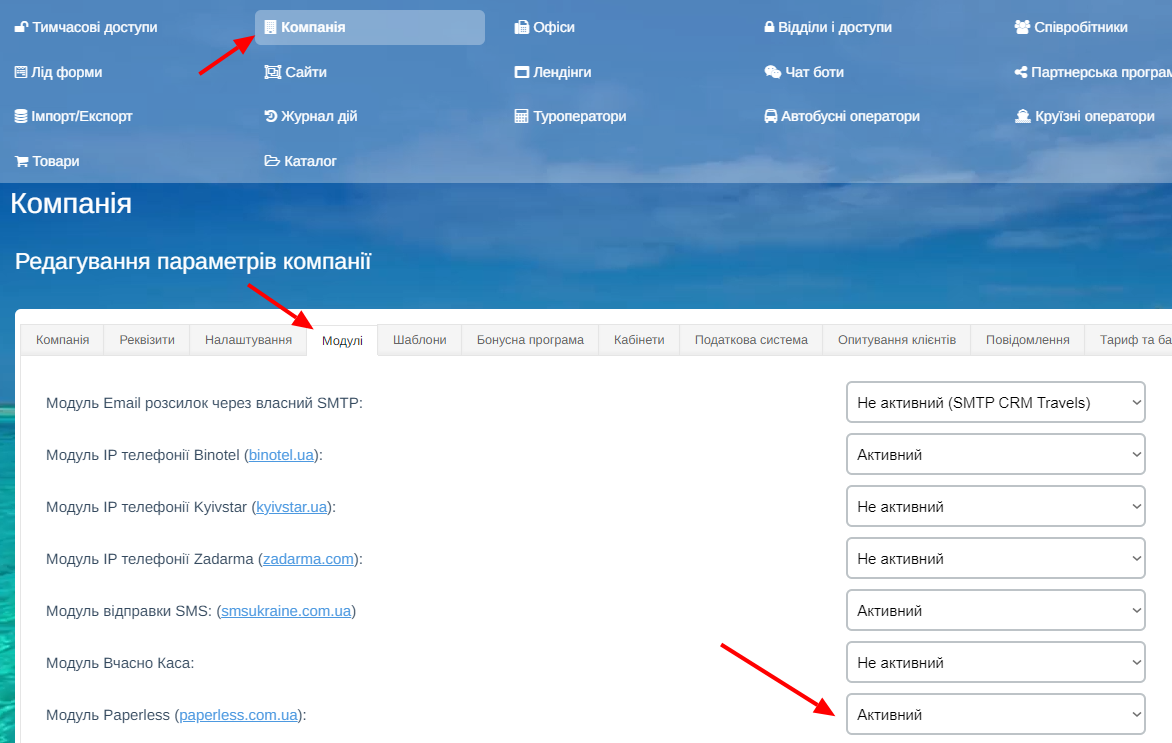
Next, we move on to the CRM settings. Go to the Company settings section, the Modules tab and activate the Paperless module:
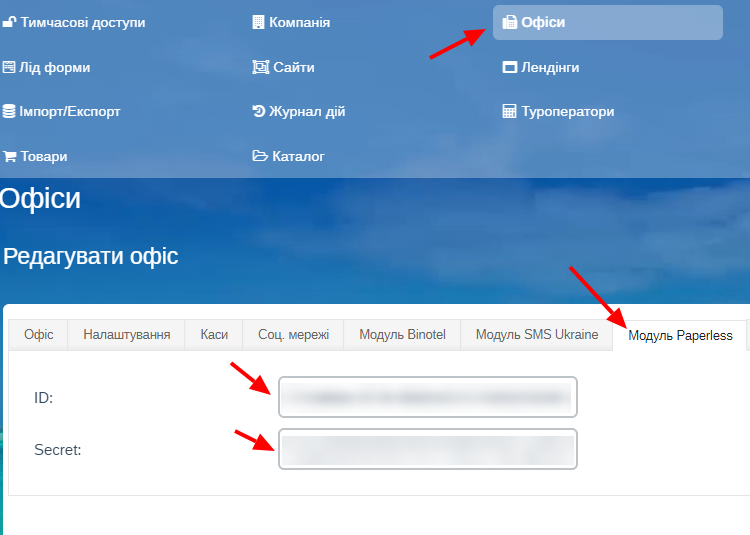
Next, go to the Offices settings menu, go to the desired office and on the Paperless Module tab, enter the ID and Secret (obtained from the Paperless service):
This completes the integration setup. Next, we will tell you how to use a digital signature through the Paperless service.
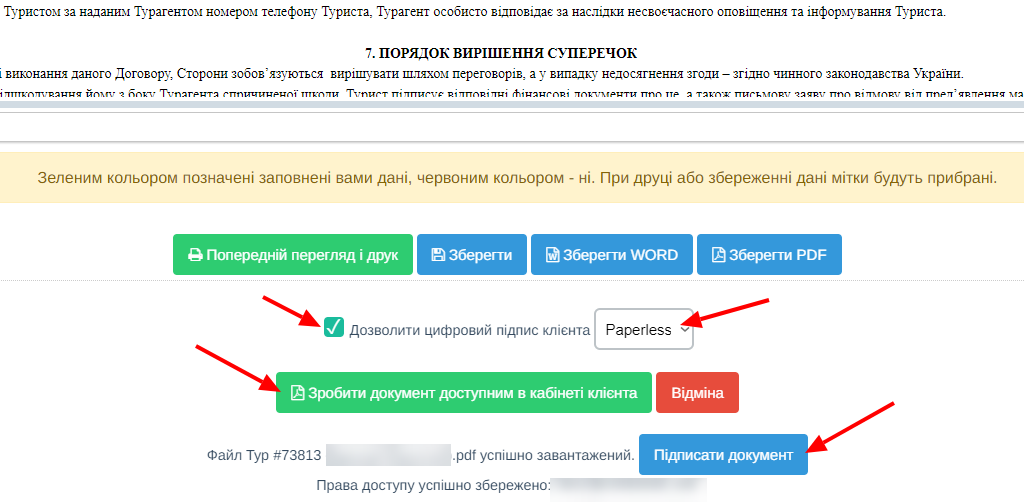
Please note that if the client for whom the contract is made does not have an email address, the Paperless service will not automatically send him a letter for signature. In this case, you need to send the client a link for signature yourself using the Paperless interface. The client can also sign the document in his personal CRM account by going to the desired reservation:

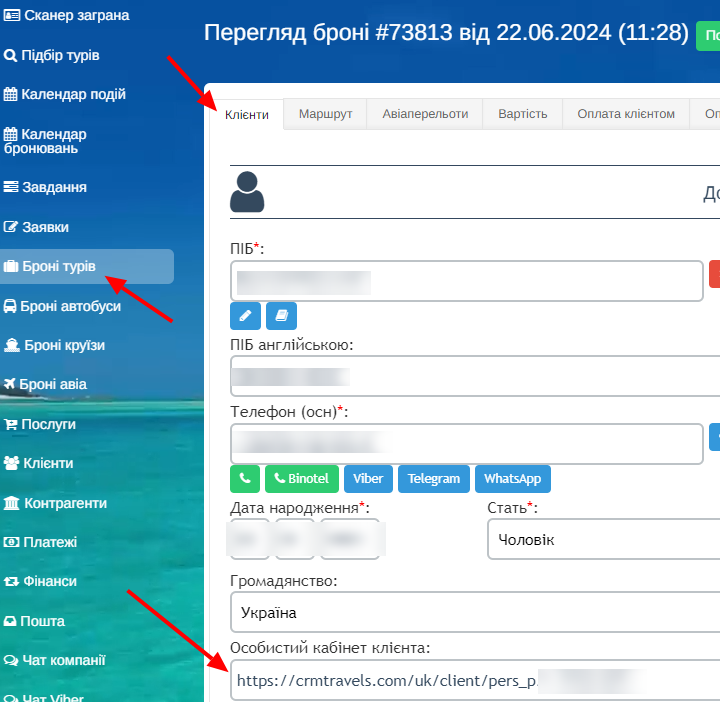
The link to the client's personal page with access to the personal account is in the services section, on the Clients tab, and also in the Clients section, you need to send the link to the client in any convenient way:
A list of all Paperless service documents with statuses and affiliation to specific services is available in the Paperless section in the left vertical menu of the CRM:

To sign a document, or to grant access to the client (if you did not specify the client's email in the CRM when sending the document to Paperless), use the buttons as indicated below:

All notifications about the document signature status are sent by the Paperless service. You can also track the document status in the CRM - Paperless section.
